For a lot of marketers, a lead capture campaign is a great way to get started with Facebook ads.
This is because optimizing for purchase conversions can be very difficult at first — especially when you haven’t optimized your funnel and when no one knows about your brand yet.
Lead capture campaigns can then warm up your new audience before you ask for the purchase. Furthermore, a lead capture campaign is easier to set up and you can get much more value out of it right from the get go.
Why do email lead capture campaigns work?
- You’re going for a much easier conversion (getting their email address), so your advertising dollars don’t go to waste trying to convert for purchases.
- It’s much easier to setup, and there’s not as much optimization required as you would need if you’re trying to get purchase conversions.
- Once you have the leads, you can use the Facebook pixel cookie to retarget your customers, which is the #1 most profitable Facebook ads campaign you can run.
- Emails can be used to build up your audience even when you don’t have a product to target them with. (Great for future product launches.)
- You offer some kind of valuable freebie that builds brand relationship with your target customer.
What are the cons of an email lead capture campaign?
- You need a strong email marketing drip sequence to activate that customer to purchase.
- It’s a 2-part conversion, so you need to have your funnel right, otherwise your ads will still be unprofitable.
- If you can get the purchase with your ads without lead capture, this brings in more direct revenue and it’s easier to measure.
- Basically if you can get a profitable purchase campaign going, lead capture is a secondary campaign you can run alongside your purchase campaign, but it should be relegated to only a fraction of your budget at this point. (However, if you can’t get a profitable purchase campaign, then the lead capture campaign is king).
Let’s get started.
What you will learn:
- How to setup your offer (viral giveaway or lead magnet).
- How to set up your Facebook ecosystem (pixels, audiences and accounts).
- How to setup the best Facebook prospecting campaign to get your giveaway generating leads straight out of the gates (starting the snowball). The more momentum you can build the more emails you will generate from your giveaway.
- How to use Facebook remarketing ads to turn those new visitors into customers and start generating a ROI before your giveaway even ends.
Setting up your offer
Creating a compelling offer is super important and brands constantly overlook this. What’s in it for the user, why should they give you their time?
Let’s dine into how to create a good offer.
Option 1: Viral Contest + Lead Magnet Combo using VYPER
Viral contest are like snowballs, once they start rolling they get bigger and bigger and become unstoppable customer acquisition machines!
This helps make your lead-gen campaign 2x more profitable, as each lead you acquire via Facebook ads can turn into 1.5 leads on average.
Haven’t created a contest yet? Sign up for a VYPER account to immediately to kick start your viral marketing strategy.
VYPER also has built in lead magnet delivery (or we call them opt-in bribes).
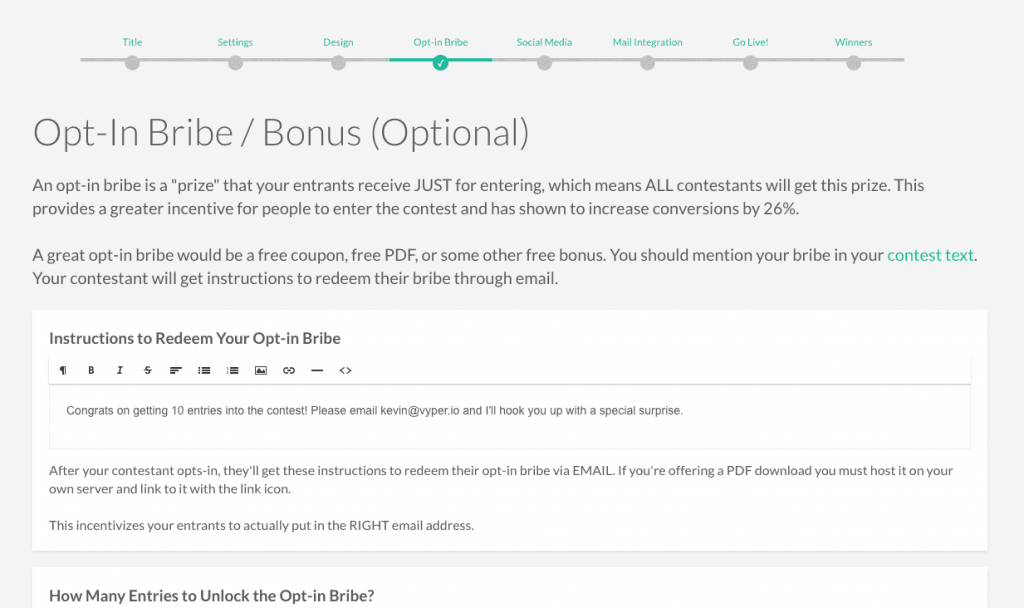
Option 2: Alternatively, you can setup a solo lead magnet.
Don’t want to start a giveaway? Awwww.
If you just want to offer a solo lead magnet, like a PDF or a coupon, you can do that with tools like Unbounce.
This requires a bit of work as you’ll need to design a lead magnet, create your landing page, incorporate a form with form creators, etc. You can also use a tool like Beacon to create your lead magnets.
We highly recommend doing a viral giveaway as it’s pretty cheap/easy to setup and you’re going to get the most signups from this.
Basics: Setting up Facebook Correctly
You will need to start off with a few basics. The bare minimum you need is a Facebook personal account and a personal ad account BUT we highly suggest following the below steps for setting up your Facebook ecosystem properly by using a Facebook Business account.
Below is a list of things you need to do right now:
- Login to your personal Facebook profile, pretty much everyone has one of these.
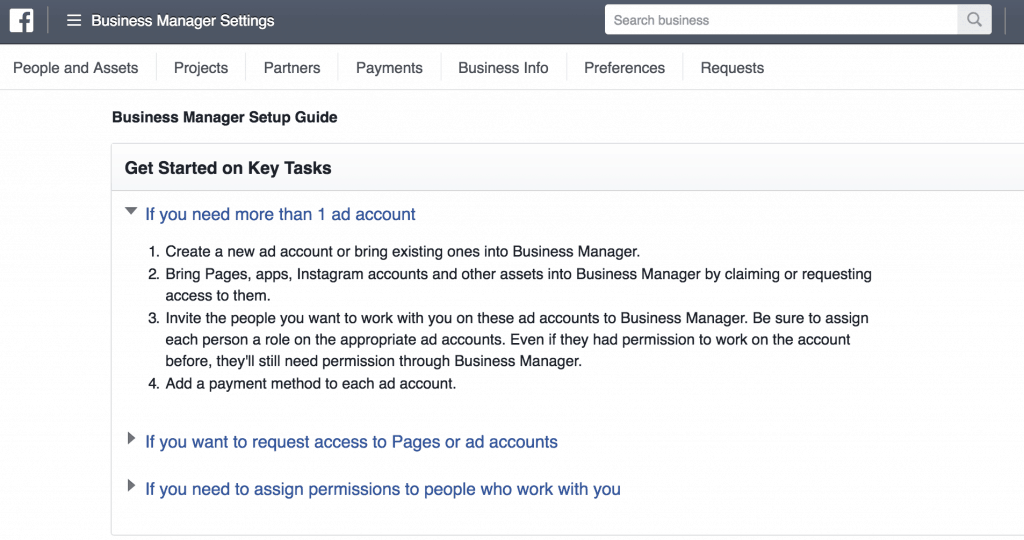
- Get a Facebook business account to get your sh*t organized, create a business account, a few benefits to this type of account is:
- Add multiple users,
- Manage multiple ad accounts,
- Manage multiple Facebook pages,
- Create multiple Pixels (you can also share these with other accounts as there is 1 pixel ID per ad account)
- Create product catalogs (used for dynamic product ads)
- Better Audiences and insights control
- Here is an overview of the Facebook business account if you need more convincing
- Create a Facebook ad account which is super easy to add within your new Facebook business account manager.
You can also easily add your billing information to your ad account once it is set up. Facebook restricts your ad spend to start with and you have to work your way up from a $25 credit limit. They trust NO ONE!

- If you run into trouble with any of this set up, Facebook has a great support portal that not too many people know about this portal, so the response times are good. You can contact Facebook reps through live chat or email.

IMPORTANT: Using pixels
The reason why Facebook is such a great marketing channel is the use of their Pixels and being able to optimize ads to a specific goal (Pixel – ie. the signup success page of our giveaway).
WTF is a pixel? – it is a snippet of code that is added to a website page that collects information on the users that views/visits the page. This information is then sent back to Facebook so you can build audiences, track conversions and create look-a-like audiences.
Using pixels in your marketing mix is important because we can set ads to optimize to these pixels.
Again, in a nutshell, this tells Facebook who to serve our ads to and target people who are most likely to achieve our goal and convert (i.e. get to our signup success page of our giveaway).
Pixel breakdown:
![]()
Below we will go into how to add pixels to our giveaway so don’t worry if this is sounding complicated at the moment, it is super easy!
Overview: Facebook Ads Explained
You will want to either use the Facebook Ads Manager (basic) or the Facebook Power Editor (advanced) to set up your ads, these are the two different methods for launching ads on Facebook.
Power Editor Pros
- Search functionality for ads and bulk editing
- No BS when setting up ads
- Adding UTM tags and pixels is easy
- Setting up dynamic product ads
- Creating canvas ads
Power Editor Cons
- Very hard to gauge ad performance and metrics
- Horrible for optimizing ads
- You kind of have to know what you are doing to use this platform
- Easy to make mistakes
Ad Manager Pros
- Easy UX and definitely a smaller learning curve
- Much better metric and optimization selection
- Filtering data functions are awesome (age, demo, placement etc.)
- Very visual for ad creation and steps users through the setup
Ad Manager Cons
- Slows down your computer a lot when trying to do too much at once
- Loads data slowly
- Having to make bulk edits is hard
So now you should know if you need to use Power Editor or Ads Manager, a lot of people get these two confused. They do the exact same thing (create ads) but just in different ways.
I do suggest using power editor to create ads then ads manager to optimize ads.
Choosing Your Ad Type
Click ads – this ad is for 1200×628 size images, there is plenty of space to visually show a CTA on one side of the image and a lifestyle or product on the other. This is one of the most common ad types.
Carousel ads – these ads are a lot more creative, they are usually have the advantage of being able to relay more information to web users as these ads have multiple images, headlines and descriptions.
Canvas ads – this is a relatively new one and helps you create a “micro landing page” within the Facebook platform. This can be a great way to educate your leads before sending them to your actual website.
Crafting Your Facebook Ad Images
It’s important to create eye-catching content. The Facebook and Instagram feed is a busy place and there are plenty of distractions.
Make sure the image you are going to use for your contest ad is the below.
- Eye-catching (use bright & loud colors)
- Add some sort of shock factor
- Keep it somewhat on brand
- Use lifestyle images with “some edits”
A few tools that I use to create ads are.
Design Pickle – These guys are by far the best service as they create outstanding content for a great price. It’s perfect for eCom brands who are running ads, contest or not. You will need a heavy flow of new creative to test. Canva – Has been around for a long time and is great as it has a free plan that can still create some pretty good images to use in your ads. It’s worth using one of their templates and adjusting it to fit your brand. Snappa – Another tool similar to Canva. These guys have a pretty good selection of templates and also have a free plan you can use.
Creating Your Contest Ad Campaigns
We’re assuming that you took our advice and decided to make a contest for your lead capture campaign. GREAT! If you didn’t and you decided to use a lead magnet, that’s fine as well, but replace the words “giveaway” or “contest” with “lead magnet.”
Onward…
We are going to go over 2 campaigns that you need to set up when running your giveaway. The first is to capture the interest of people who will be most likely to enter your giveaway and the second is to re-engage those who have entered your giveaway or shown interest in it.
1. The Contest Prospecting Campaign
We need get our contest out there and seen by the world. So the best way to do that is to create a high quality ad that has a good Click Through Rate (CTR) and is optimized to the (lead) pixel we are going to place on the contest entered success page.
Quick guide on how to set these pixels up in VYPER (note, you must have the PRO account for tracking pixels to be allowed).
-
- Create/login to your Facebook Ad account
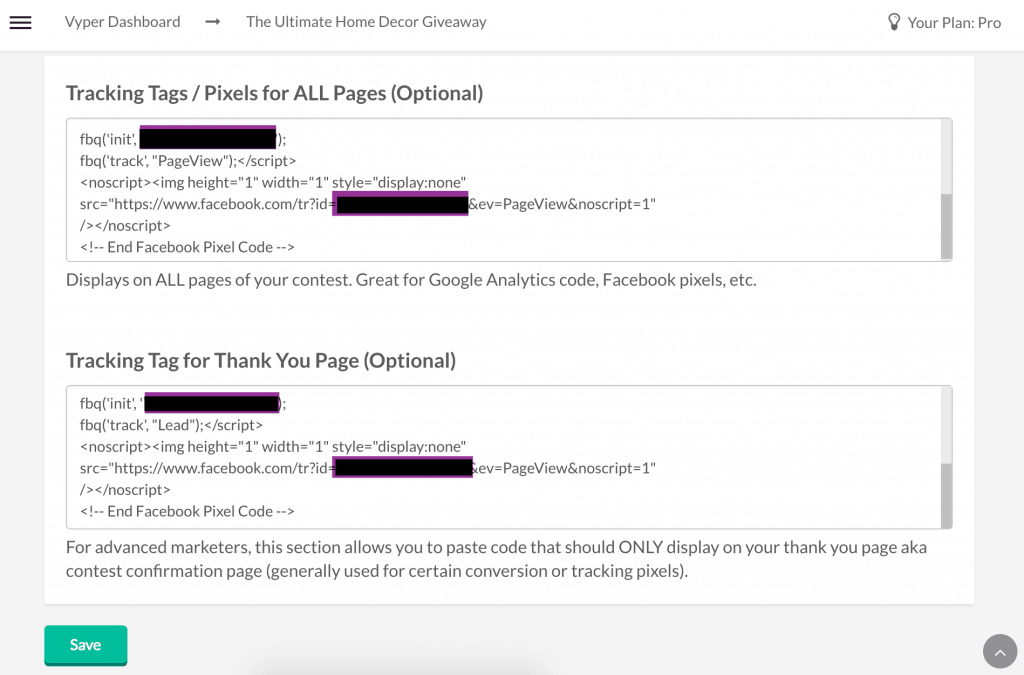
- Add the Facebook pixels to your contest page. This can be done on the settings step when creating your giveaway.
We are placing the “PageView” (all pages) and “Lead” (thank you page) pixel.
NOTE – if you are already using the pageview pixel simply rename the pixel. Change “fbq(‘track’, “PageView”); to fbq(‘track’, “ContestPage”);.
- Create your Ad. We are using the carousel ad to show off all the products that we are giving away.
The CTR is usually better on these ads as you can provide more information before paying Facebook for the click through to your contest page. Meaning you can validate the user/click better.
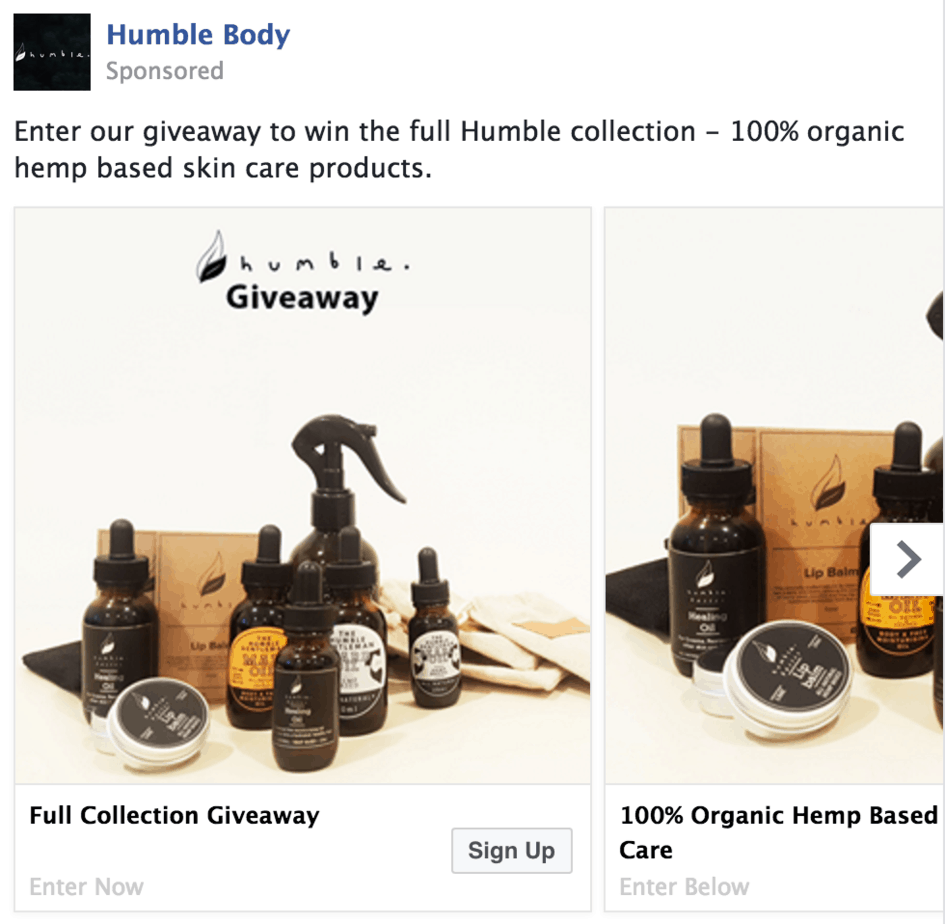
- Create a list of your competitors. This will help target people who are already interested in what you sell (product or information).
E.g. We ran a giveaway for HumbleBody.com (hemp based skincare products) so we collected a list of other organic skin care brands. - Create your campaign, I use the following naming convention to keep my campaigns descriptive and organized – “leads / contest / competitors”.
This helps define our campaign “conversion goal / content type / targeting type” and I also use the UTM builder and the camping name to see the traffic in Google Analytics.
Below is an example of the link that I would use in my ads.
- Source = facebook
- Medium = cpc
- Campaign = leads / contest / competitors
- Create your ad sets, I usually break these out into the interest group or placement. For Humble Body we create 6 ad sets making the interest different in each ad set.
- Decléor
- Olivella
- Juara
- Tata Harper Skin Care
- …….. and a few others
- For the bidding strategy set a lifetime budget and automatically optimized to your offsite conversion pixel (Lead).
A lifetime budget is easier to manage and Facebook’s optimization algorithms are not forced to spend your full daily budget which prevents you from wasting money! Once you have run a few campaigns you can then switch to daily budgets.
- Create/login to your Facebook Ad account

Now you are ready to launch your ad campaign. Make sure your ads are set to run only while the giveaway is accepting entries so set the ad end date 1 day before your giveaway end date.
2. The Contest Remarketing Campaign
Now that you know that people want your product (they visited your contest page) you can set up some remarketing ads to engage these people again.
Returning visitors are 7x times more likely to complete a conversion goal than a first time visitor.
Quick guide on how to set these up:
- Create your custom audience from the PageView pixel we placed above. I usually break out my audiences into 10 or 15 day increments from when someone visited. So my audience naming convention would be – PageView (15), PageView (30) and PageView (180).
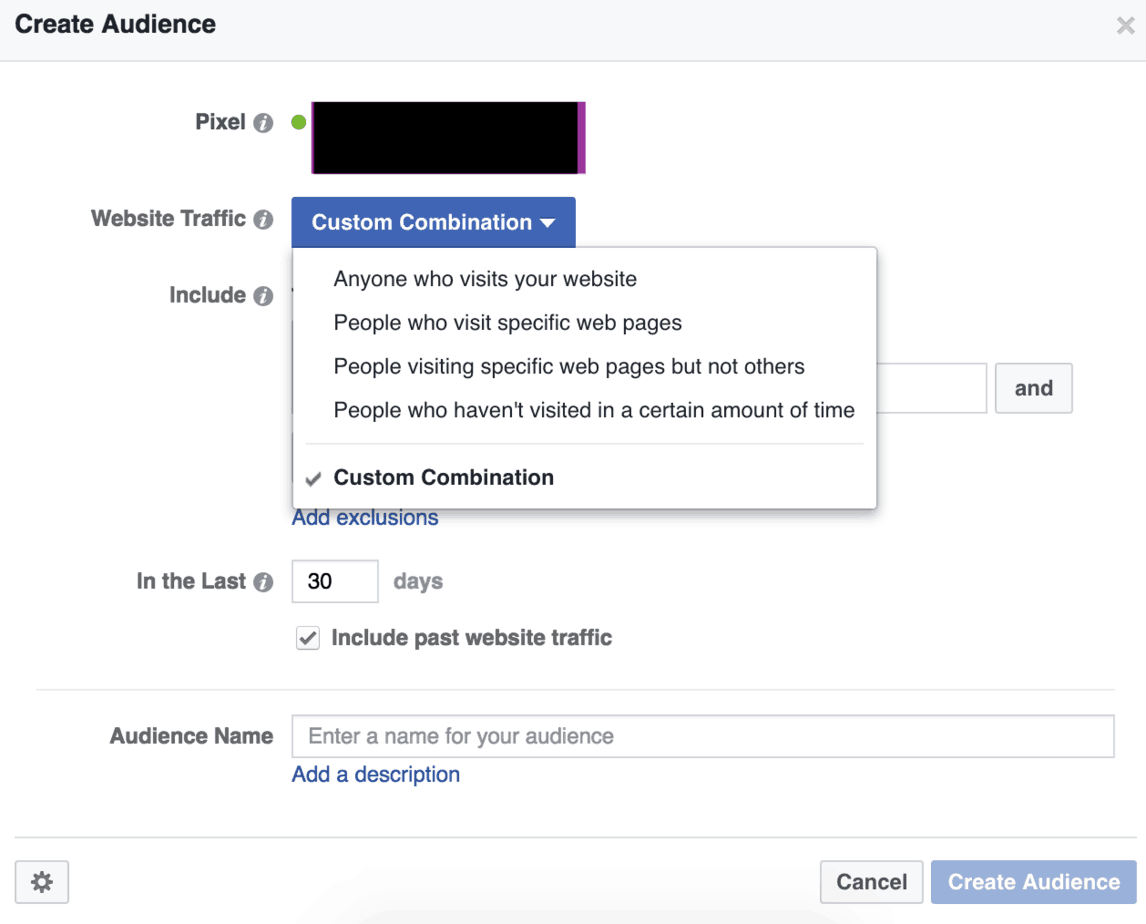
- Go to your audience page in Facebook manager and choose create audience. You can find this page from the mega dropdown, click on the “audience” menu item.
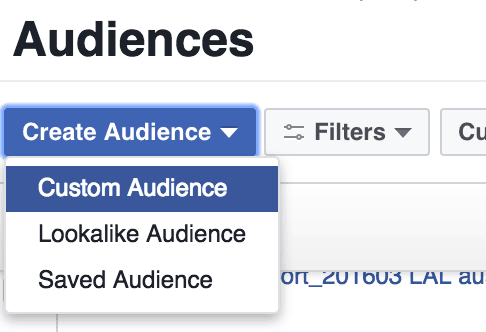
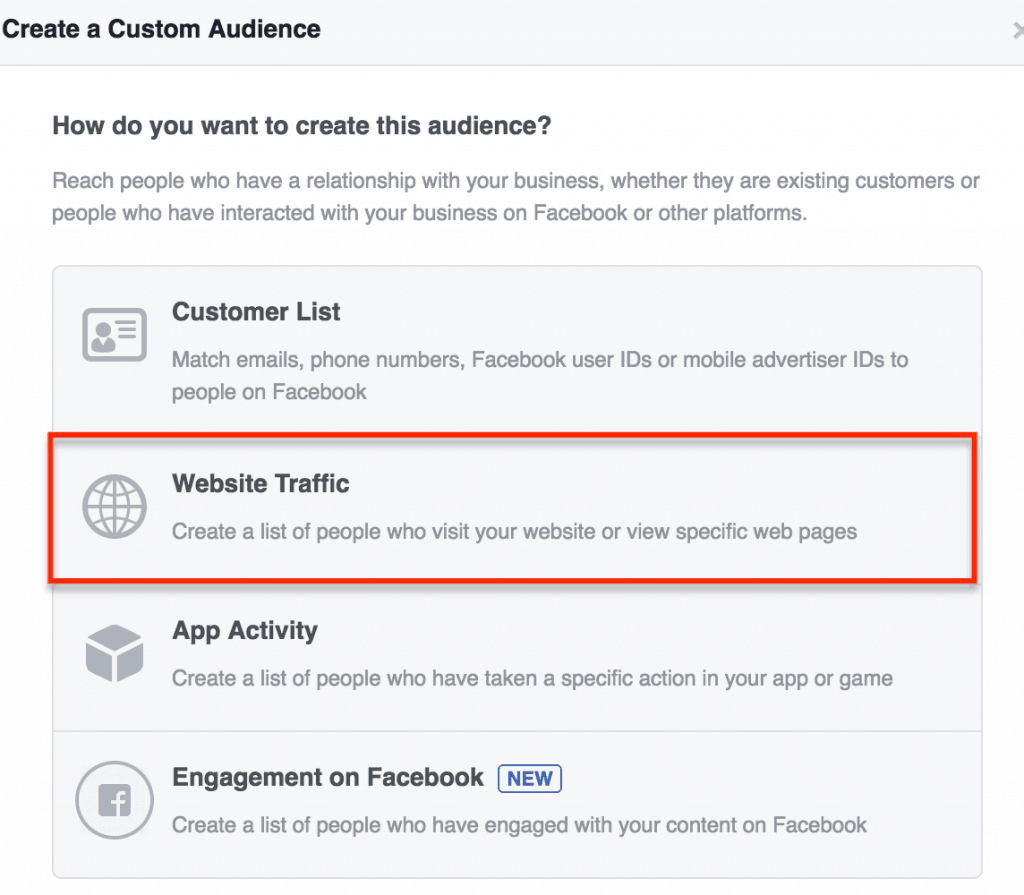
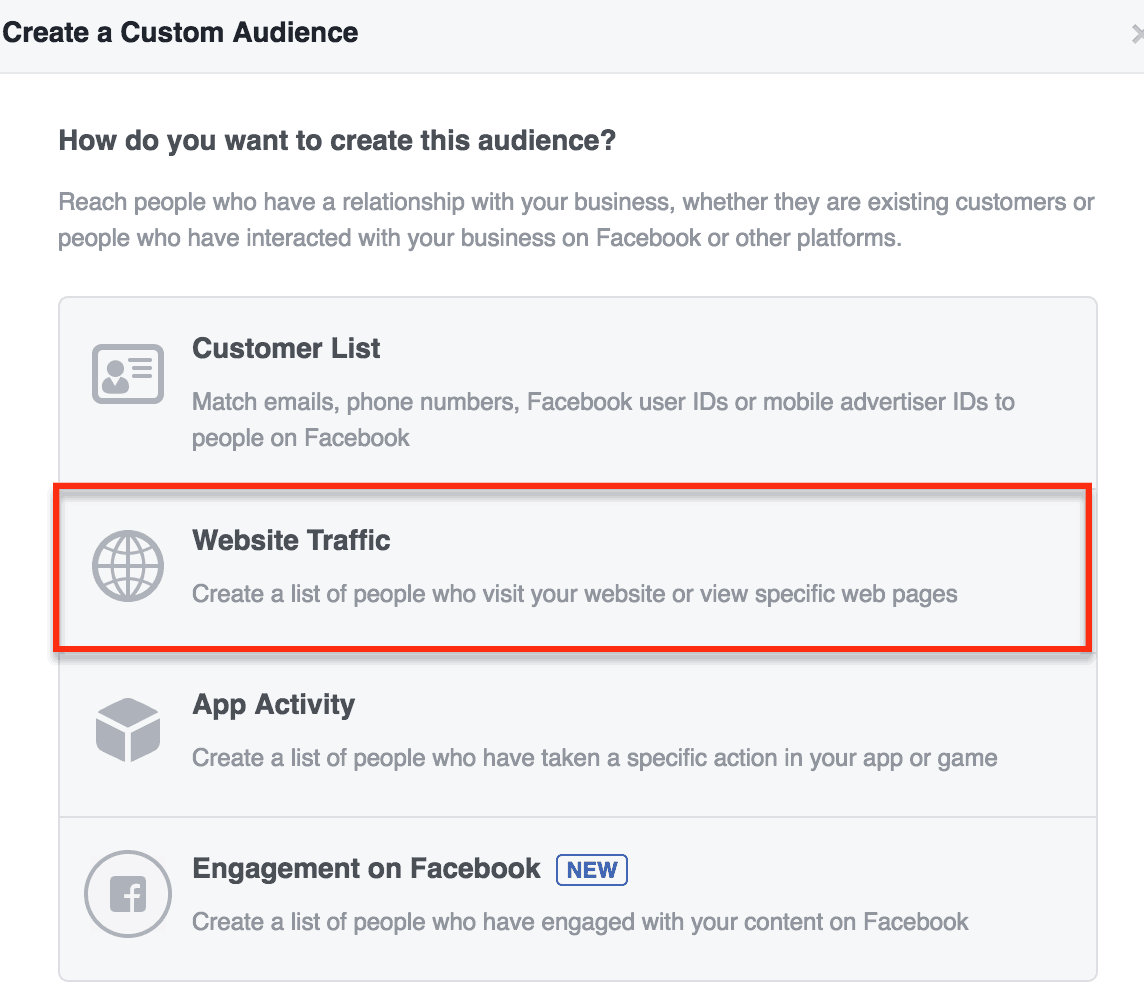
- Create a new audience using the website traffic tab. These are the best audiences to create as they automatically update as more people visit the page unlike uploaded lists that need to be constantly uploaded to stay relevant and up to date.
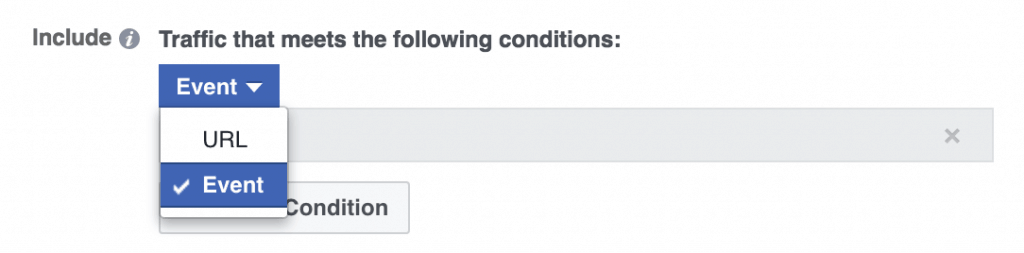
- Create a custom combination audience. Using custom combinations allows you to include and exclude certain traffic so this can be a very powerful tool.

- Choose the event for traffic conditions. We use the event instead of the URL as this is a more accurate method of collecting data on our website visitors.
- Select the pixel “PageView” if you want the audience to be even more targeted you can choose the “Lead” pixel that we placed above, this smaller audience will serve ads to the people who have opted-into your giveaway.
- Go to your audience page in Facebook manager and choose create audience. You can find this page from the mega dropdown, click on the “audience” menu item.
- Create your campaign I use the name “retargeting / contest visitors / female”. I like to create a male and female campaign so I can optimize by gender. This means pausing ads and ad sets that are not performing well (CPA or CTR too high).

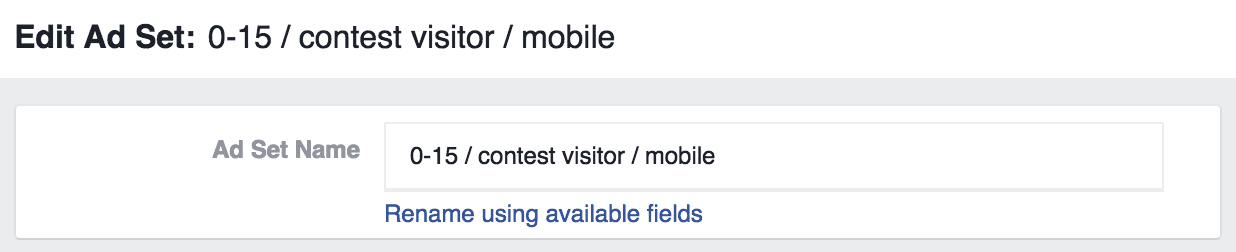
- Create your ad sets, I usually break these out into the time periods mentioned above so for example “0-15 / contest visitor / mobile” and “0-15 / contest visitor / desktop”

- Create an ad that has a special value proposition for people who have already visited your contest or page. For example we offered a 10% discount for our remarketing campaign.
E.g. Still looking for that perfect “xxxx”, come back and get 10% off your first order with the coupon code “xxxx”.
- Once you have created the Audiences and ads you are ready to go live and start making some money!


So there you have it, the killer combination of Facebook ads and giveaways. This tactic works for bringing in new visitors to your website through the incentive of the giveaway as well as recapture those visitors with an incentivised remarketing ad.
With this tactic you can collect emails and generate sales from new prospects.
Tips for Facebook
- When creating your ads test 3-4 images and text variations to see which ad combinations get the best conversion and clickthrough rates. You can then pause the ads that are not performing well to save some cash.
- Aim to have an audiences that has at least 1000+ people in it as the minimum Facebook daily budget is $5/day. You want your audiences to be target but still have enough people in them so that your ads run at a reasonable frequency (e.g. we do not want 1 person to see our ad 10 times in a day).
- Optimize your ads to the Facebook pixels. Facebook do a pretty good job at automatically optimizing your ads for the best ROI. It is worth setting some benchmarks though as you can’t simply do whatever Facebook says. See how much your are paying for the below are compare to industry benchmarks:
- Lead (aim for $1-4 for a basic email sign up)
- Click through (aim for a CTR above 0.5%)
- Cost per click (aim for a CPC under $3)
- Note that all of these metrics will depend on the type of industry and niche you are in.
- Pause ads that have no conversions (Leads) and a high spend. This is why we separate out the interest groups, gender and days since a visitor hit your website. You will probably find your product is best suited to a certain gender, interest and that the 0-15 day period since visiting your website perform better than others.
BONUS – If you want to utilize your Facebook pixels for more than just your giveaway check out some of the options below how on to install the pixels across your entire website.
![]()
Here is the Facebook guide to setting up pixels on your website, if this is a little too much we suggest using a plugin within your CMS.
Essentially you need to place the “PageView” pixel in the header template of your website, you will need the Facebook Chrome browser extension to see if the pixel is firing correctly.
Here are guides to adding pixels to the most popular CMS’s
The pixels I like to add to my website are:
- PageView (we can also create custom pixels for contest pages)
- Lead (used for giveaways, email capture tools etc.)
- AddToCart (used for abandoned cart)
- InitiateCheckout (used for abandon checkout)
- Purchase (make sure you have dynamic checkout values on this pixel)
The first two were the pixels we used in our giveaway settings.
If you have any questions about this strategy please leave a comment below are I will personally answer it for you! If the question has sensitive information and you don’t want to give away all your secrets you can email me directly at jack@vyper.io
Happy Growth Hacking Peeps!


Wow. This was a very detailed post – right from setting up the account to final layout.
I am definitely going to keep all the points on mind while drafting a new campaign for my client.
Remarketing is also very important – without remarketing the campaign is almost very incomplete.
Thankyou Vyper for sharing such detailed post about Facebook ads.
The tips shared very really useful! Cant wait to use them in next campaign.
I would like to grab attention towards our Website = https://talentela.com
Talentela!
is a team of top marketers that enable your brand through Branding, Content Curation, Design and Marketing.
We’ve identified that in today’s digital world,
talent is the real deal. Not just any kind of talent. Talent that gives your brand a strong voice. Talent that creates an impact. Talent that is agile and can adapt to this new virtual era. Talent that takes onus and delivers results.